Fantasty Figures – Thia Greymark

udwlfxf

Another addition to the party!

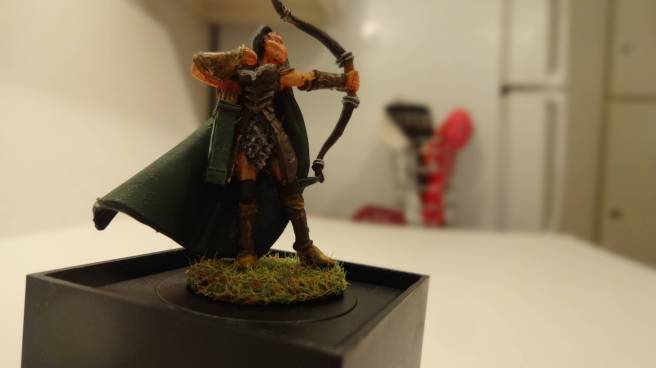
Thia is my second figure for my local D&D party. Thia is an elf, who lost her parents at a young age, and has taken to adventuring to find out what happened to them. She carries with her an antique key that she believes is the answer to what happened to her family.

Well, what does Thia do?

Thia is an Elf Wood Ranger. Rangers are skilled at ranged combat, typically with a longbow, and are outstanding hunters. More specifically, Wood Rangers are adepts at blending into forests, tracking down targets, and interacting with animals. Thia actually has a wolf companion that joins her in her quests, as she can speak directly with him. Rangers do not shy away from a fight, and Thia’s perfect aim with her bow makes her an invaluable member of our adventuring party.

Fiction imitates Fiction

When I spoke with the player that controls Thia, I asked questions about how she should look. Other than what I knew about Wood Rangers and what the figurine had clearly laid out (bow made of wood, leather armor, etc), I didn’t have much information to work on. Luckily, she was able to send me an image of the inspiration for her character, and I was able to work with that.


Just like Helga, the figure is made entirely of pewter and could’ve been painted without any primer. However, I think spraying a coat of Alclad II Black Primer over the entire model followed by a couple light coats of Alclad II White Primer really  brings out depth and detail. I typically paint by hand “from the inside, out”.

Flesh and Hair

Though Thia is an elf, I wanted to give her a bit brighter skin tone to match her hair and show that she spends most of her time outside. To accomplish this, I painted her hands, arms, face, and thighs with a base coat of Vallejo Model Color Sunny Skin Tone. I wanted to keep her warm appearance, even in the highlights, so I mixed a 50/50 blend of Vallejo Model Color Orange Brown and Salmon which I painted on the tops of her arms, hands, and around her cheekbones, nose, and chin. To restore the depth of the features, I applied a Valljeo Ink Skin Wash. Her hair was actually quite simple, a base coat of Vallejo Model Color Orange Brown, followed by a thinned coat of Woodgrain gave it a natural redness.

Cloak

I wanted to avoid brush marks on her cloak as much as possible, so I opted to airbrush the base coat. This turned out to be quite a mistake. I didn’t want to spend a ton of time masking the other parts (such as her face, torso, and bow) and I assumed I could easily paint over any thin overspray. I couldn’t have been more wrong, as flesh colors tend to be rather transparent compared the opaque green I used. This forced me to do much more work, rather than saving me some.

The base coat was built up with light passes of Vallejo Model Color German WWII Green Camouflage. I felt that this green was bright enough to look good, but also close to a color that could actually be used to conceal yourself in a forest. After the base coat had dried, I mixed an 50/50 blend of the base color and Valljeo Model Color Park Green as a highlight. Applying this was easy, as I took a small brush and just dragged it along the edges of the cloak where light would hit it. For shadows, I used a similar method. Mixing a 50/50 of the base coat and Vallejo Model Color Dark Green, I painted this into creases, under her hood, and near her torso. To add variety, I painted the border of her hood with Vallejo Model Color Pale Gray, and highlighted the center dots with White.

Leather Armor

I didn’t quite get the results I wanted, but I feel like it turned out looking pretty good. For dark leather armor (torso, shin guards) I started with a base coat of Vallejo Model Color Chocolate Brown. I followed this up by highlighting edges using a 50/50 blend of Flat Earth and Japanese WWII Uniform. Afterwards, I applied a wash of Vallejo Model Color Smoke, but not thinned too much. This gave a more “real” wear to the leather.

Light leather (boots, bracers, knee guards) were painted with a base coat of Dark Sand. I highlighted the creases and tops of the bracers with 50/50 Dark Sand and Japanese WWII Uniform. This time, for the wash, I mixed some Smoke with Woodgrain and applied this over the entire base coat (rather than in creases only) and I think this gave it a more muddled appearance.

For the chain mail “skirt”, I applied a base layer of MiG Gunmetal, followed by some drybrushing of Vallejo Model Air Steel. The Eagle crest on the torso is also Steel.

Bow and Quiver

I opted to make the quiver the same colors as the cloak, since they could be made out of the same material. I highlighted the edges of the quiver in the same way I did for the cloak. Arrows were tipped with Tamiya Red, and the shafts were Vallejo Model Color German Medium Brown.

Her longbow had a base coat of Vallejo Model Color German Dark Brown, and I applied streaks of Smoke to this coat to get a more textured feel. The grip used Vallejo Model Color Leather Brown, and accents were done with Vallejo Model Air Steel.


Base and Finish

I wanted to go simple for the base, so I simply used Vallejo Model Color Flat Earth. After the paint had dried, I used an 80/20 mix of water and Elmer’s Craft Glue as a fixer. Next, I put some grass flocking through a metal strainer, and allowed the grass to dry.

The entire figure was then sprayed with Model Master Clear Gloss Lacquer to build up a protective coat, and allow a black wash to flow. After a few passes, and about 12 hours of drying time, I added the Model Master Black Enamel wash to all creases on the figure. This is what truly brings it “to life”. To complete the figure, I sprayed it with Model Master Clear Flat Lacquer.

Conclusion

This figure was definitely a learning experience. I will take the time to mask future figures when airbrushing, and spend a bit more time with my bases. Thia looks great on the battlefield standing behind Helga.

Fantasy Figures – Introducing Helga

Why a figurine?

A close friend of mine decided to start up his own game of Dungeons and Dragons (Fifth Edition) recently, and it has been an absolute blast. Several of the other players are rather new to the game, and are really enjoying themselves. If you are not familiar, D&D is played on a tabletop, with maps, pen, and paper. In order to keep track of players and monsters alike, figurines such as this one are often used and placed on a large grid. After our second game, another player headed to a local hobby store, and picked up figurines that are the most like our in-game characters.

Who (or what) is Helga?

Helga is a half-orc barbarian woman, who spent most of her life as a sailor. Orcs are some of the most common enemies in D&D (and the fantasy genre in general). They are strong, blood-thirsty, and more often than not, stupid. Half-orcs are part orc, and part human, which means they have the best features of orcs (brutality, strength, toughness) and the best of humans (compassion, ambition, intelligence). Barbarians are excellent fighters, and rely on direct force as opposed to tactics and strategy to conquer their problems.

Barbarians typically wield axes, clubs, and other simple weapons combined with a shield. What sets Helga apart, is one of the things that makes D&D so fun and intriguing: her backstory. Each player is encouraged to give her character a backstory that describes the character’s wants, desires, fears, motivations, beliefs, and prejudices. I’ll spare you the lore-ridden details, and let you know that Helga’s scars are from a dragon that attacked her ship out at sea. Helga was the only survivor of the attack, and she’s returned to land to hunt the dragon. This is where the actual campaign starts!
Bringing Helga to life

The original figurine is made of pewter, and can be painted without primer if you choose. However, I’m a big fan of Alclad II Black Lacquer Primer, as it is painted over easily and gives the best finish (in my opinion). It is also great for figurines, as you can concentrate your paint to the tops of surfaces, and let the black primer work as a pre-shade for shadows to create depth.

Skin

Personally, I prefer to use the “inside-out” technique with smaller models. Essentially, here we will start with Helga’s skin and work our way out. Flesh (even orc flesh) tends to be the lightest color on a figurine, so starting with it allows you to paint over mistakes with the darker shades to come. Mixing the right shade of green for half-orc skin took some trial and error, but I found this combination of paints worked best: Vallejo Model Color – Pastel Green for highlights, 10:1 Pastel Green w/ Luftwaffe Camo Green for shadows (such as under the cheeks and between muscles), and Orange Flesh for wounds and scars. I used a broader brush for the base coat, and thinner brushes (up to 00) for contours under the cheek bones, eyes, lips, and neck.

Stones

Before starting on the armor and weapons, I painted the stone base. It was relatively easy, but require a few more steps. I started with a base coat of Vallejo Model Color Luftwaffe Gray, and filled the cracks with a thinned mix of 2:1 Dark Seagreen. After the paint dried, I drybrushed Vallejo Model Color Pale Seagreen on the tops and ridges of the rocks, giving the base extra depth. I felt satisfied with the stones, and would add more details later after a protective clear coat.

Leather and Straps

It would be too easy to just get some thinner and leather paint and just give one coat to everything. Instead, I used the black primer to my advantage, and left very thin profiles of each leather strap around them. This gives the strap depth so that it doesn’t appear as small. A base coat of Vallejo Model Color Leather Belt for almost all straps looked good, but I used Chocolate Brown for the shadows, and Saddle Brown for highlights. A good tip is to use the shadow color around the edges / trim on the leather, and use a 00 brush of the highlight color on any raised details. Helga’s belt buckle was painted using Citadel Balthazar’s Gold.

Chain Mail

It took me some time to figure out how to paint the chain mail and still give it detail and depth. I knew that I shake too much to precisely paint the chain links, so I went a different route. I applied a thinned base coat of Vallejo Model Color Medium Seagray. I brushed this on gently and tried not to flood the grooves between the chain links. Once dry, I drybrushed Vallejo Model Air Steel using a broader brush. This paint was excellent, as it has a lot of shine and is already very thinned for airbrush use. It took quite a bit of patience to get into most of the nooks using this technique, but I like the end result.

Hair

I have never really painted hair on a figure before, as most of my figures are wearing standard issue military helmets. It was refreshing to get the chance to try my hand at something a bit different. Again, the black primer worked very well here to create natural shadows between her locks. I applied a thinned base of Mig Satin Black onto most of the surfaces, and then highlighted with a combination of regular and drybrushing Rubber Tires on the individual locks. This turned out well, but I also used a Testor’s Flat Black enamel as a wash to fill the gaps and add contrast.

Weapons and Armor

Helga’s Axe was painted using a coat of Alclad II Polished Aluminum over the black primer. I love the way this paint shines, and looks even better under a clear coat. Afterwards, I applied Vallejo Model Color German Medium Brown (with highligts of Chocolate Brown) for the wood handle. Saddle Brown was used to highlight the bindings around the grip. I wanted the blade to stand out from the axe, so I applied Citadel Balthazar’s Gold to the edge.

I wanted Helga’s Club (the pale stick on her waist) to stand out and look different from other wood on the figurine. I decided to base coat it with Vallejo Model Color Pale Brown, and highlight the textures with Medium Brown. I know this sounds like it’s counter-intuitive compared to the rest of the model, but I was looking for a little variety.

Helga also has a few pads of leather armor for extra protection. Her left leg, right forearm, and right shoulder all have this. I used colors similar to the other leather, but a bit darker to make it appear more rigid. I mixed Vallejo Model Color Chocolate Brown 3:1 with Black, and thinned it with Vallejo Airbrush Thinner. After this had dried in all the cracks, I took some Vallejo Model Color Medium Brown to the highlights using a small brush. Finally, I took a 00 brush and traced the trim on the armor with Vallejo Model Color Silver. This was a bit tough on the should pad, but the results were good.

I knew that Helga’s Shield would be one of the most focused-on parts of the figurine when it was complete, so I was determined to do it right. Using the inside-out techinique, I started with the wood, and left a very thin profile of black around the edges to maintain depth. First, I used Vallejo Model Color German Pale Brown, and then used thinned German Medium Brown in the creases and between the planks. I switched over to the front of the shield, and used the same technique. However, I also added an extra wash of Vallejo Model Color Chocolate Brown, since the front will have seen more wear. This gave me the opportunity to use the German Pale Brown to highlight the twin dragons. Once the wood was complete, I painted the leather strap around her arm (similar to described in the previous section). Lastly, I used a broader brush and Citadel Balthazar’s Gold to create the trim.

Details

Helga’s face was painted using the colors and techniques described under the Skin section. For the extra bits, I used Vallejo Model Color Pale Gray combined with White to paint the fangs and eyes. Mig Satin Black was used for her eyebrows, this was definitely tricky and took a few tries. Her large scar across her face was where she was disfigured by the dragon, and is her most prominent characteristic.

I wanted to try adding blood to a figurine, but I knew it was easy to overdo the effect. I took a thin brush, and used MSP Fresh Blood to tip her axe, and splattered some on the rocks in front of her with a thicker brush. After the splatter, I thinned it out quite a bit, and put some in the cracks between the rocks. For added effect, I used MSP Splattered Crimson and touched her armor and shield in a few different places using a small sponge. The effect is very subtle, but I like it.

I also took a bit of thinned Model Master Rust Enamel and touched the edges of the shield using a sponge brush, to create a more textured effect rather than the uniform metal. Finally, I added a Mig Dust pigment to the ground to add some subtle depth, and then sealed the whole model up with Vallejo Matt Varnish.

Conclusion

This was a very fun, and very rewarding experience. I learned a lot about how skills with scale models can transfer between different subjects, and how different paints appear at various scales. The entire figurine took about 4 to 5 hours of work total (not including drying time) and I can’t wait to do the ones for the rest of the group!.


Custom Zaku II WIP Update #1

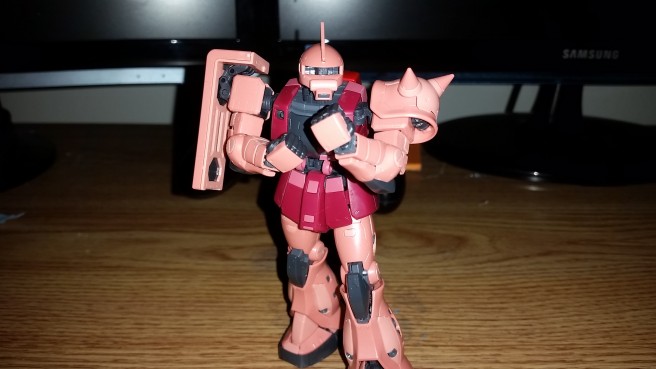
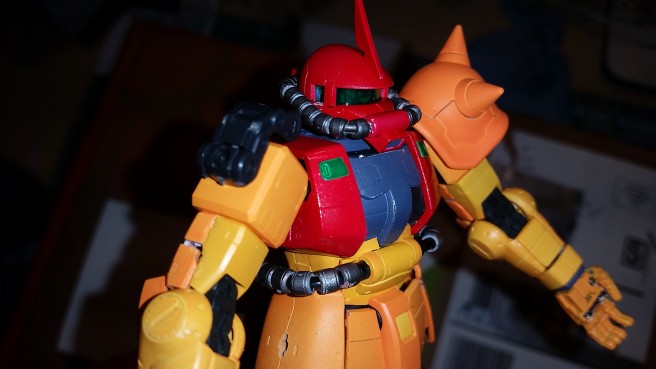
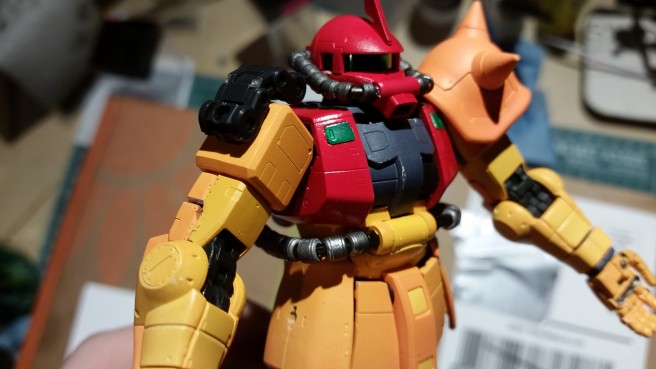
My first Gunpla is coming along rather smoothly. Not satisfied with the basic color configuration, I wanted to get some good experience airbrushing brighter colors and create something unique to display on my shelf. Basic research on Reddit and with the Layman’s Gunpla Guide told me everything I needed to know to pick out a good first kit. I brought my wife to the local hobby store and she helped me choose the RG Zaku II Custom. The kit was excellent, with plenty of details, color-coordinated sprues, and easy-to-follow instructions.

“Come at me, bro”

vala6d3

Gunpla kits are special in that they can be built straight from the box. No glue or paint is required to get a good finished product, but like many modellers, settling for “good” wasn’t in the blueprints. I started by cutting all the parts from their sprues, and assembling the kit to ensure I had all blemishes taken care of. This also helped me get a good idea for the color scheme I wanted. To map it out, I made some easy MS paint changes to a picture of the box art, and went to work stripping the model back down into individual parts.

**Add box art pic here**

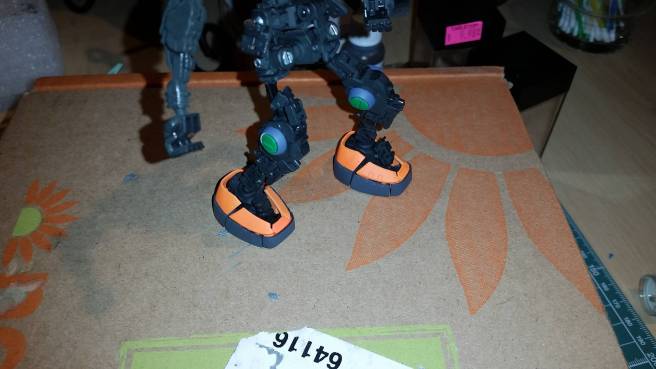
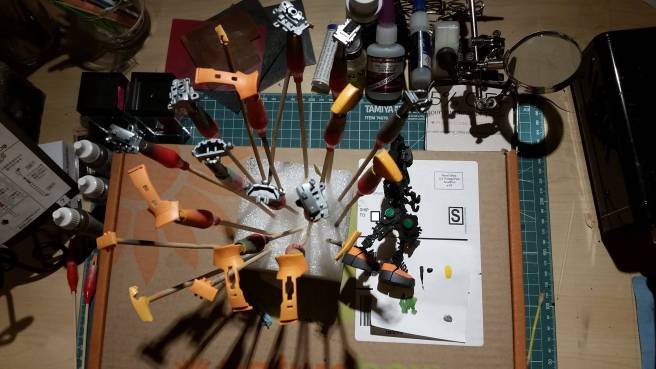
After the model was torn down, I re-assembled most of the basic frame. I could paint this all as one unit, considering that most of it won’t be visible after the armor plating had been added. For this color, I primed in black and used Vallejo Model Air Medium Sea Gray mixed with a couple drops of Flat Black. Taking care to add small details for a nice finish, and covering all joints, I had a decent frame. This pic was taken after I tested an orange on the “boots”.

twm3uga

Whenever you use custom paint colors, it’s a good idea to pre-mix the shades, so you can have consistent colors throughout the model. I didn’t realize this until after I had done some test colors on the “boots”, so the leg units have slightly darker colors than the rest of the model. Orange and yellow are notoriously difficult to work with, as the paints are honestly slightly translucent. In order to achieve the “truest” colors, I primed all orange / yellow parts with Alclad II White Primer straight from the bottle to my airbrush.

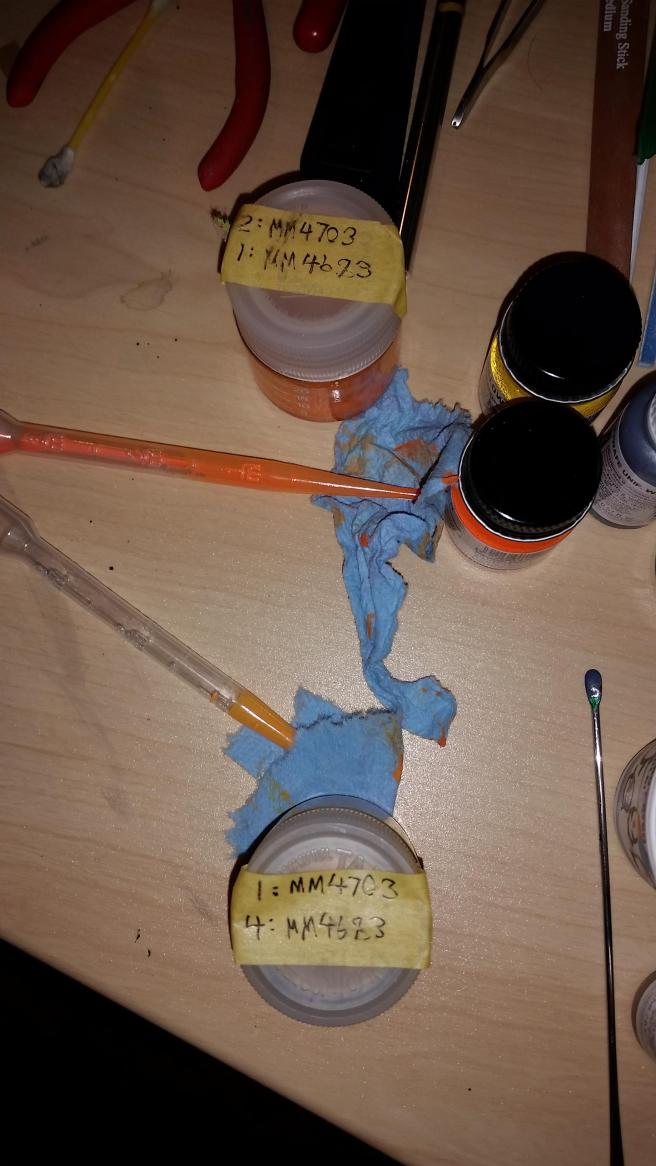
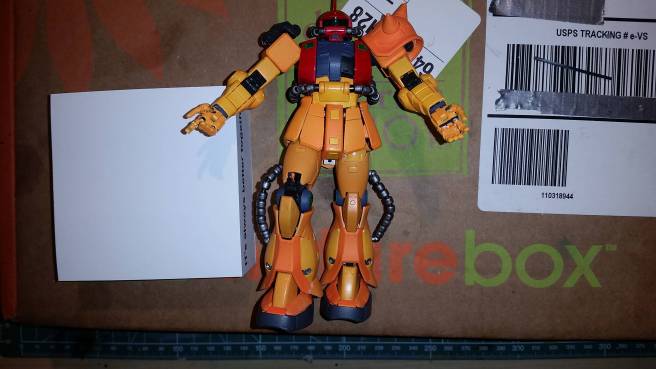
The colors I mixed were Model Master Flourescent Red (MM4073) with Chrome Yellow (MM4683) at 4:1 then mixed with thinner at about 2:1 paint to thinner. The lighter orange of the suit is the same paint, but mixed at 2:1 instead of 4:1. I used some Tamiya pots for this, and they worked really well! Another great modelling tool are disposable clear pipettes. You can get them for very cheap on Amazon / eBay, especially since you don’t need the sterile kind.

vza52lr

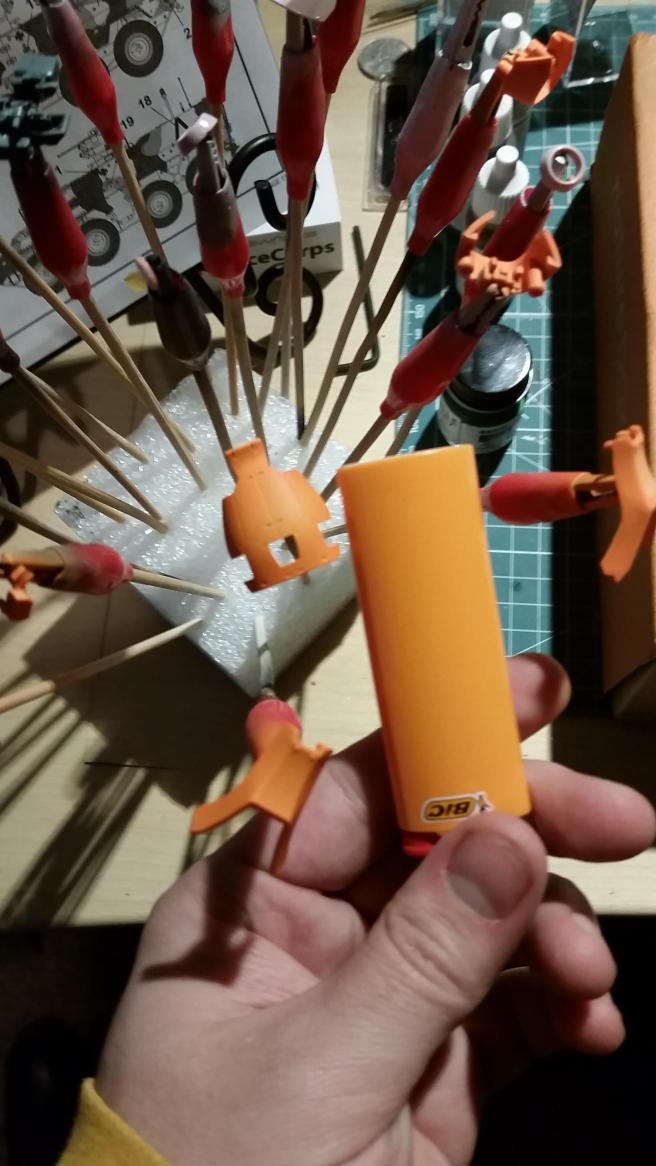
I was very happy with the results, and felt that it was pretty true to my color inspiration for this model. I set up some leg unit parts on alligator clips, and had at them with the white primer and both shades of orange.

Hey, it matches my lighter!

cerd3c8

I used Vallejo Model Air Steel for most of the engine / booster parts. I love how it looks when it dries, and it has just the right amount of polish to give a great finish, regardless of the weathering you add to it. Here’s another beauty shot, with some steel parts showing.

ontt7sr

Dem shins, tho

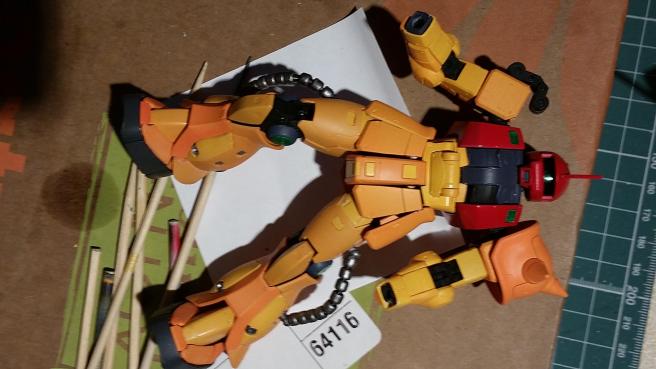
One of the trademark looks of the Zaku suit, is it’s armored “hoses” on the legs, waist, and head units. These hoses are armored, and I wanted to make the armored rings stand out from the hoses. The kit supplies two springs (one for each leg), and the waist and head units use styrene rods. To simplify the painting process, I threaded some wire through the armor rings.

I slapped some black primer on it, and then used MiG of Jimenez Gunmetal to get a dirty metal finish on them. They weren’t easy to work with, and I definitely lost a few in the process. But modelling is all about having fun and enjoying the build, so I didn’t let it get to me.

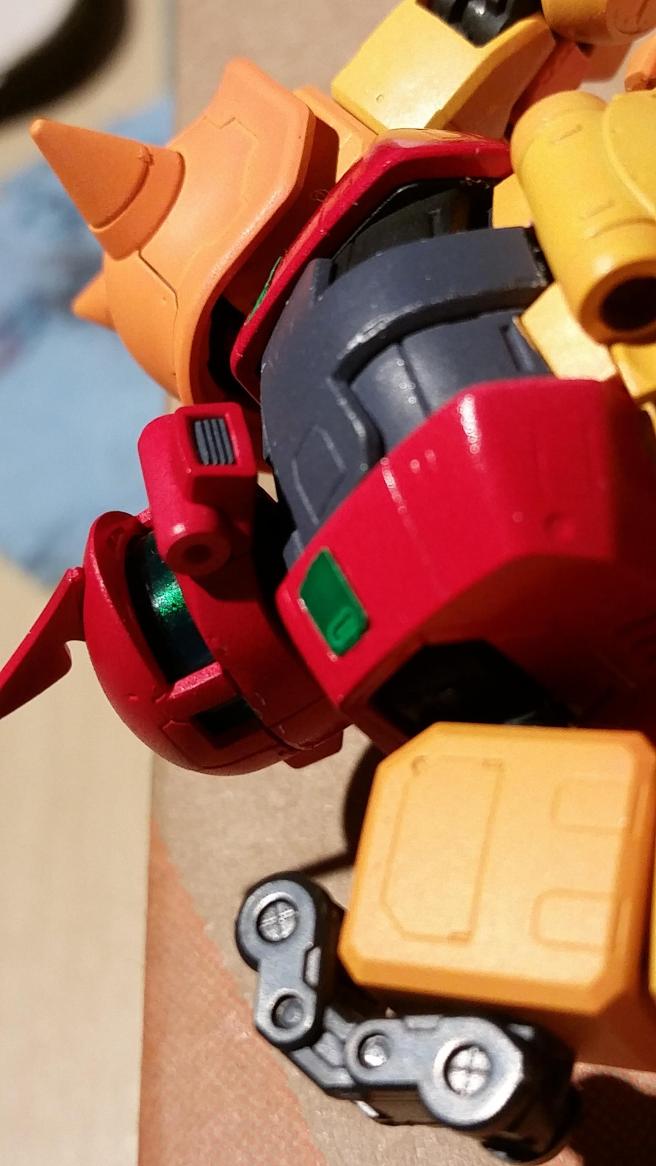
I continued building the rest of the body the same way. For the armored chest unit, I had an extra jar of Tamiya Red lying around, and wanted to use up some of it. I seemed to forget that Tamiya acrylics are incredibly thick, and I didn’t get quite the finish I wanted, but that’s okay too!

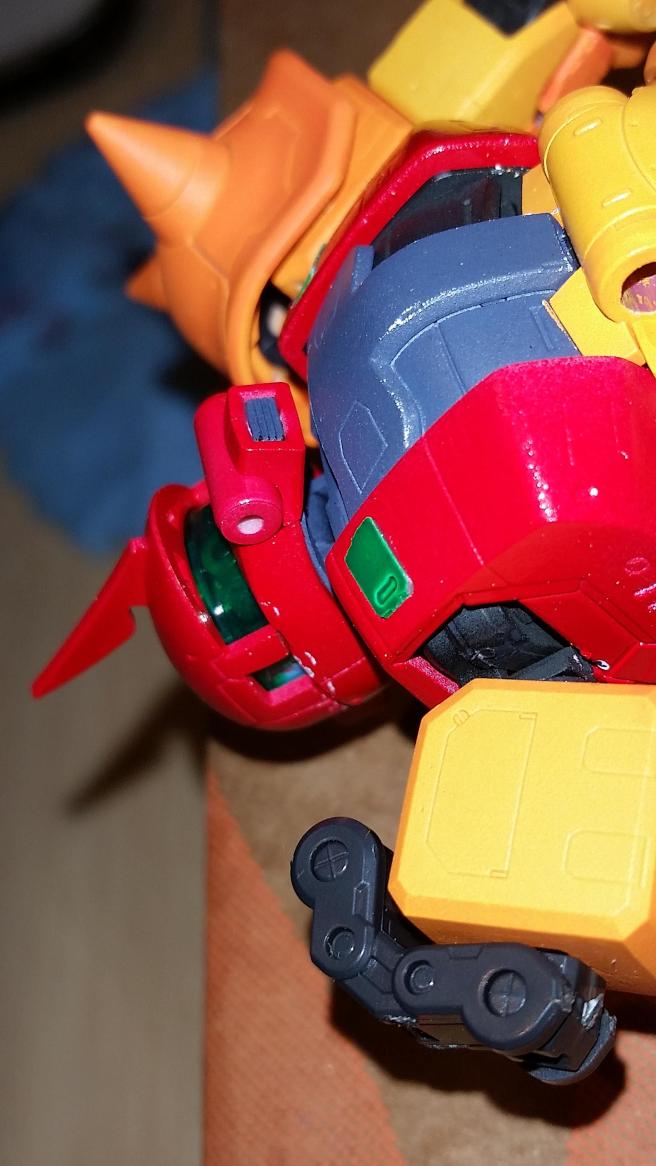
I hit the left arm shield with a coat of white primer, and wanted to try something a bit different. I got the idea to use the Metroid symbol (in case you haven’t caught what I’m doing with the color scheme just yet). It seemed easy, a couple concentric circles, and then hand-painted details. Unfortunately, I didn’t put as much planning into it as I should have, and my work was sloppy. Needless to say, I cleaned it up with acrylic thinner before painting the base coat.

Yeah, these totally line up. 10/10 work


While I prepared for the next steps on the armor, I threw some Alclad II Black Primer straight from the bottle onto the weapons. I didn’t know how the weapons are actually supposed to work, but I wanted to test out some Alclad Polished Aluminum. I spoke with a couple friends at my local modelling club, and the secret to using Alclad lacquers like this, is to prime in black. Here’s a nice WIP pic for you.

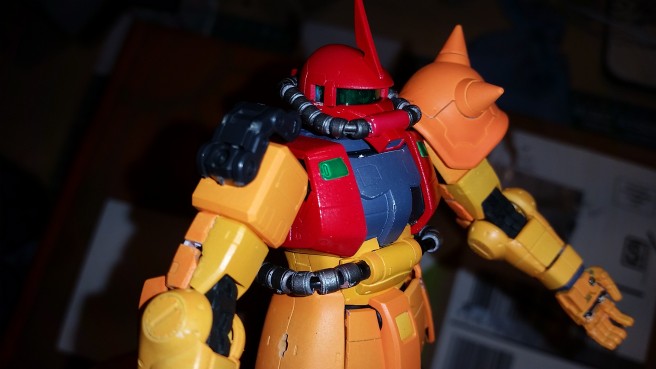
At the same time, I experimented with using Model Master Clear Green acrylic to tint some spare clear sprue. My inspiration came from Samus’ Varia Suit from the Metroid series, and one of Samus’ trademark looks is her red helmet and green visor. The test on the clear sprue turned out excellent, so I used the same airbrushed color onto the visor.

Please excuse the blur, you get the idea


I was nervous working with the Clear Green


Alclad II Polished Aluminum turned out decent, it was great practice

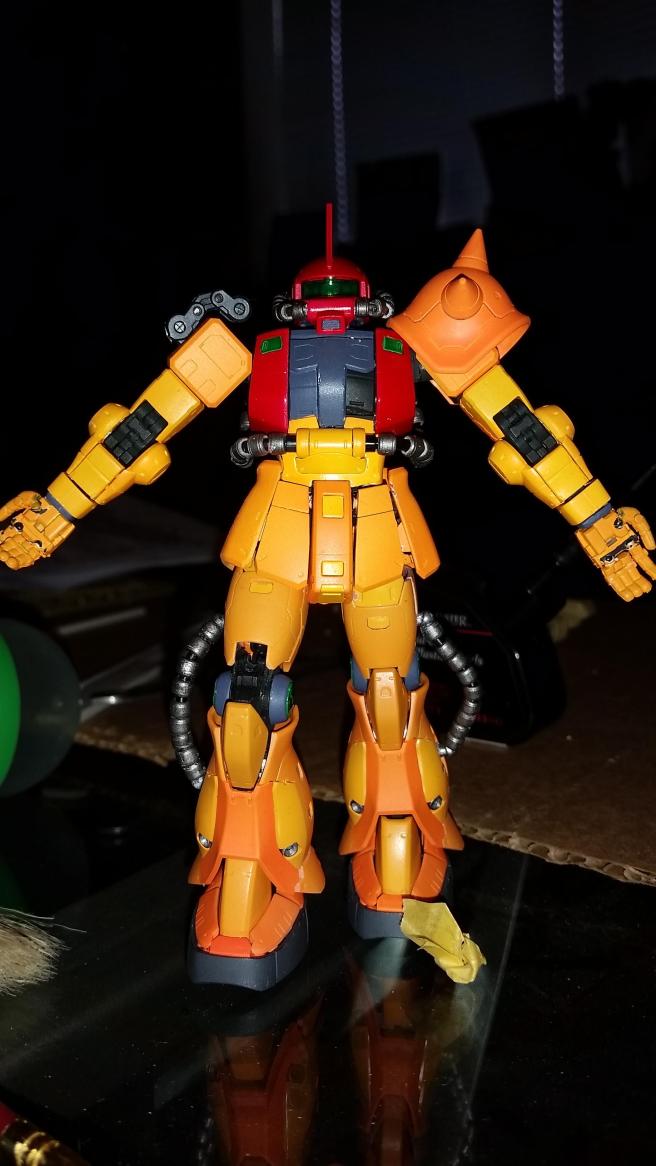
Attaching the head unit, plus some beauty shots!

v2hc76uht5edltmcd8bm7mcd8bm712r9fqonm0ip6htsud2lcyy7l210g

Soon, I’ll be adding a clear coat, decals, panel lining, weather, and weapon details. Hopefully at this point, the model will be essentially complete! Thanks for reading, and check back soon for a nice finished produce!

Tamiya 1:35 M151A1 – First Time Weathering

7owyvy1

fcyltyg

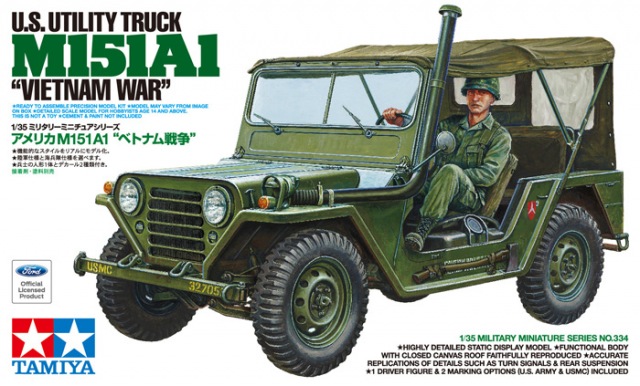
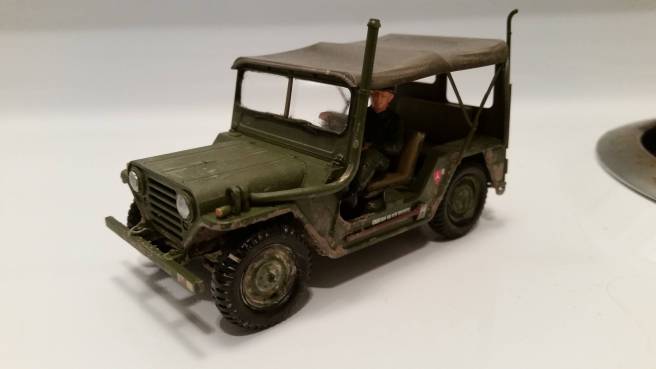
Following my previous build, I wanted to try a smaller model that was operated in the same time period by the USMC. This way, I already had most of the paints on hand, and the two would look good sitting next to each other all lonely on my shelf. I did a few things to this build that were a significant improvement over the Tamiya Patton. The model was not intended to be perfect, but rather a testing bed for new techniques. The result was satisfactory, but obviously I would do it much different this time around if I could.

My wife saw how much I was getting into building models, and how happy they made me. I would talk to her about kits and supplies that I wanted, and she would listen without seeming too bored. Apparently, I kept talking about how eventually I wanted to use an airbrush. Enough of this talk and she was sick of it. My birthday rolled around and she gave me a relatively large, heavy box that I didn’t expect. Inside was a Haarder & Steinbeck Ultra with a Badger compressor. It’s an excellent starter airbrush, and I couldn’t wait to try it out. The M151A3 seemed like a good bet, since it was small, cheap and mostly one solid color.
3lvrqgm

The kit itself had an excellent fit, and went together with absolutely no trouble at all. I probably had the entire thing assembled in a matter of a couple hours. This was easy to accomplish, because for the most part, the Jeep is a single assembly. With everything assembled, I hit it with a coat of Tamiya Gray Primer right from the can. I left the tires, seats, and canopy off and went to work airbrushing the body. Here I learned a very important lesson:

The thinner ratio for airbrush painting is different than brush painting.

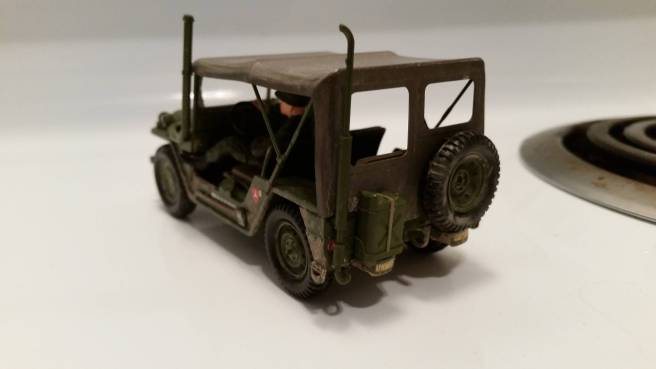
When I started spraying the Khaki Drab roof to the vehicle, I found it difficult to get the coverage I wanted. I also noticed my airbrush was clogging frequently, and I would have to disassemble the entire thing and clean it (breaking the momentum). Turns out, I was only putting a few drops of thinner in with the Tamiya paint. Some research revealed that Tamiya acrylic paints should be thinned at a ratio of 1:1 when used in an airbrush, preferably with Tamiya Acrylic Thinner. I applied this knowledge and re-coated the body a couple times, and it turned out nice and uniform. Afterwards, I finished up the tires and seats with the airbrush. I’m not very happy with the black I chose for the tires, but that was another lesson learned.

we3magc

Playing with glue and pigments

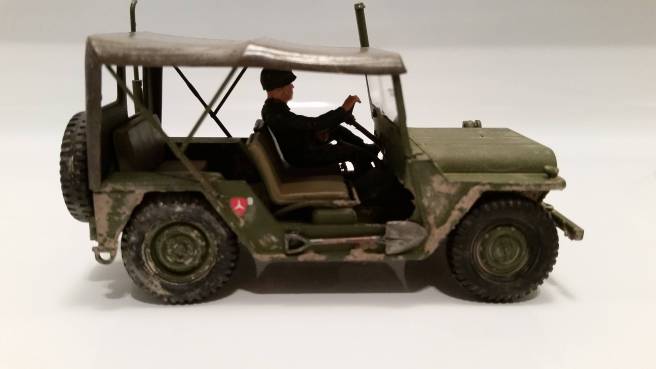
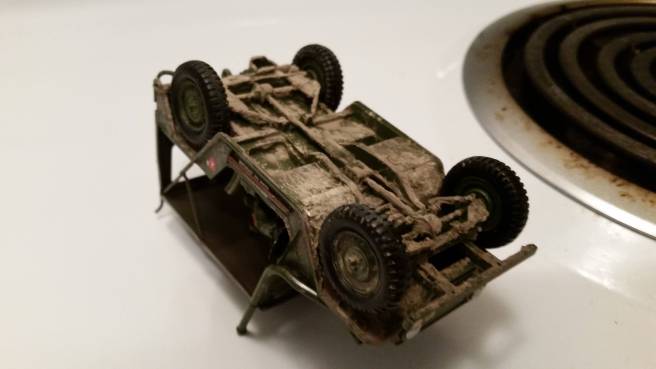
I picked up a couple jars of Ammo of MiG pigments that I thought would look good in contrast to the olive drab base coat. For this, I used “light earth” and “European dirt”. To apply them to the model, I first mixed a 1:1 ratio of water and Elmer’s White Glue. Once this was thoroughly mixed, I dipped a fat brush into the glue mix, and spread a thin layer on the bottom of the vehicle. Elmer’s Glue dries clear, but you still want to avoid using too much and ruining the finish. Once the glue was in place, I dipped a different fat brush into the pigment powder and patted it into the glue. This created a dark base coat for the mud. Afterwards, while the glue was still wet, I dipped the fat brush into the “light earth” pigment, and sprinkled it on top. Once the bottom was done, I spread mud around the vehicle where I thought it would accumulate, and added a dusting of light earth around as well. The result wasn’t bad, but could definitely use improvement. I regret not putting more on the wheels.

yomirrm

This kit was a lot of fun to build, and was a great introduction to weathering methods and practice for my airbrush. Here are a few more beauty shots of the finished product to enjoy:

0xwyi4dfcyltyg

Tamiya 1:35 M48A3 Patton – First Build

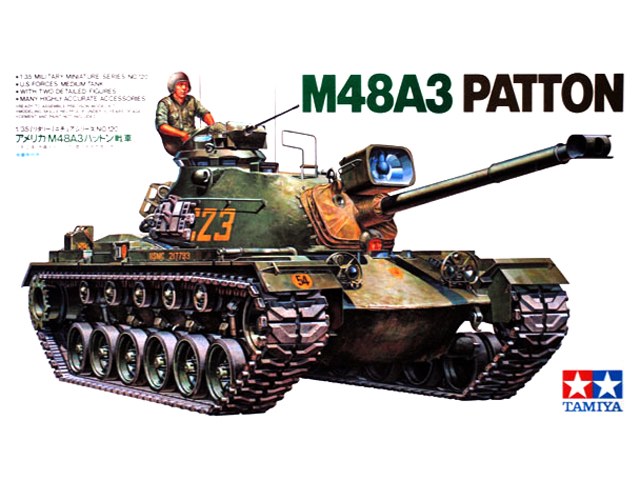
After about a decade of no styrene, I finally gave into my creative urges and drove down to the local hobby store I had seen near a terrific burrito place. I initially walked into the store with no plans to leave with merchandise, and instead left with one of these:

ktz6x13

The post WWII-era shape, infrared light, and gun barrel heavily pulled me towards this kit. I decided to bite the bullet and purchase it, along with a slew of paints and other tools. I’ll be posting a tool / supply catalog now that my workshop is a bit more fleshed out in the near future. For this model, it was pretty much Tamiya Olive Drab in a spray can, Tamiya Acrylic paints, Testors plastic cement, toothpicks, snippers, sandpaper, and some simple brushes. The build took a total of two months, and it was a great time reintroducing myself to all the concepts of modelling. The fit of the kit, in retrospect was not impressive. If I could rebuild, I would definitely do more body work. This is especially true fro this old Tamiya kit, as it still had plenty of holes where switches and batteries belong.

kkcaqgi

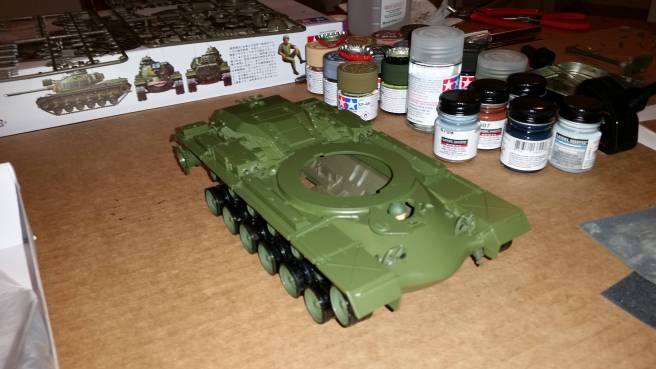
Building up the hull was quick and straightforward. One of the first lessons I had to “re-learn” from starting up again: Armor should be built and then painted when possible. I ended up doing a lot of brush work, and having a very uniform (see: bad) finish. Quite a bit of time was put into this model without a lot of payoff. The details on the body were plentiful, and would’ve made for some great weathering and washing. I may return to this kit in the future to do better work.

mutw262

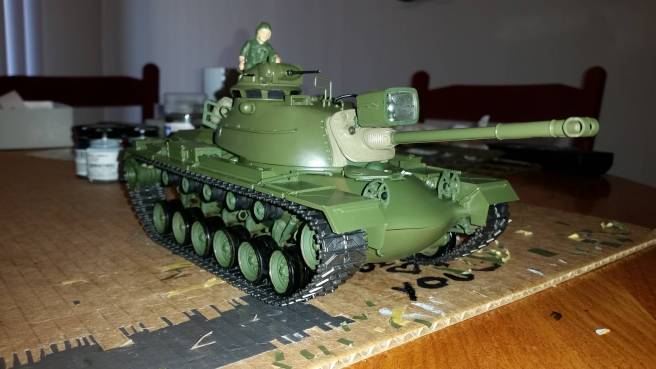
Here you can see the fully-built kit and it’s many flaws that resulted from my inexperience. The most notable being the massive gap between the hull halves at the front of the vehicle. The second most obvious blunder are the tracks. No paint, no weather, no washes, just bare Tamiya rubber. Now that I’ve spoken to other modellers, the popular opinion on these tracks is pretty negative. I was working with mostly acrylics so the tracks would’ve resulted in heartbreak as the bent/stretched tracks would crack the paint and look worse than bare. Here you can also see how all the paint is a uniform color. It was a very “paint by numbers” type of build. Olive drab goes here… leather goes there… silver goes here…

4fzmav7

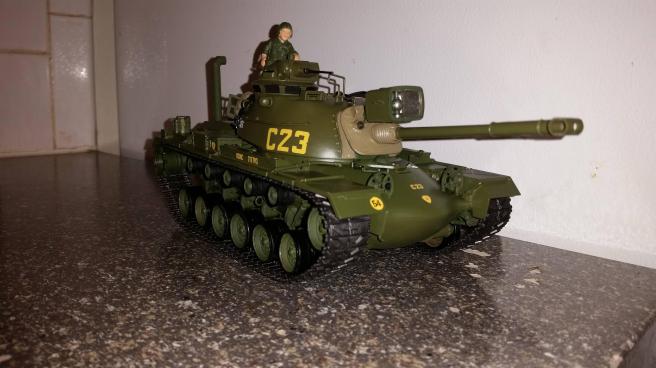
Finally, I added the decals. Most of my experience for this type of work came flooding back to me while I was doing it. Despite not using a clear coat (which now I ultimately will recommend), the decals show no silvering or other problems. This may be because the Tamiya Olive Drab spray can laid down a nice, even coat that the decals adhered to easily.

This model was truly the beginning of a new adventure in my life, and I look forward to sharing many more wonderful experiences with you. You can find a complete album of the build here, though it is not as complete as my later posts should be. Thanks for dropping by!